
In Supernova, it’s possible to render components from a private npm registry to use in your documentation. You can configure your npm registry within Supernova to enable specific scopes of your choosing.
When configured, you can use the Render React code block to render code from your private library.
Enable npm registry

- In your Workspace settings, find the Private npm registry page.
- Under Enable private npm Registry, toggle the switch to On.
- Fill in the configuration settings depending on which host you would like to use, in the following step.
Registry configuration
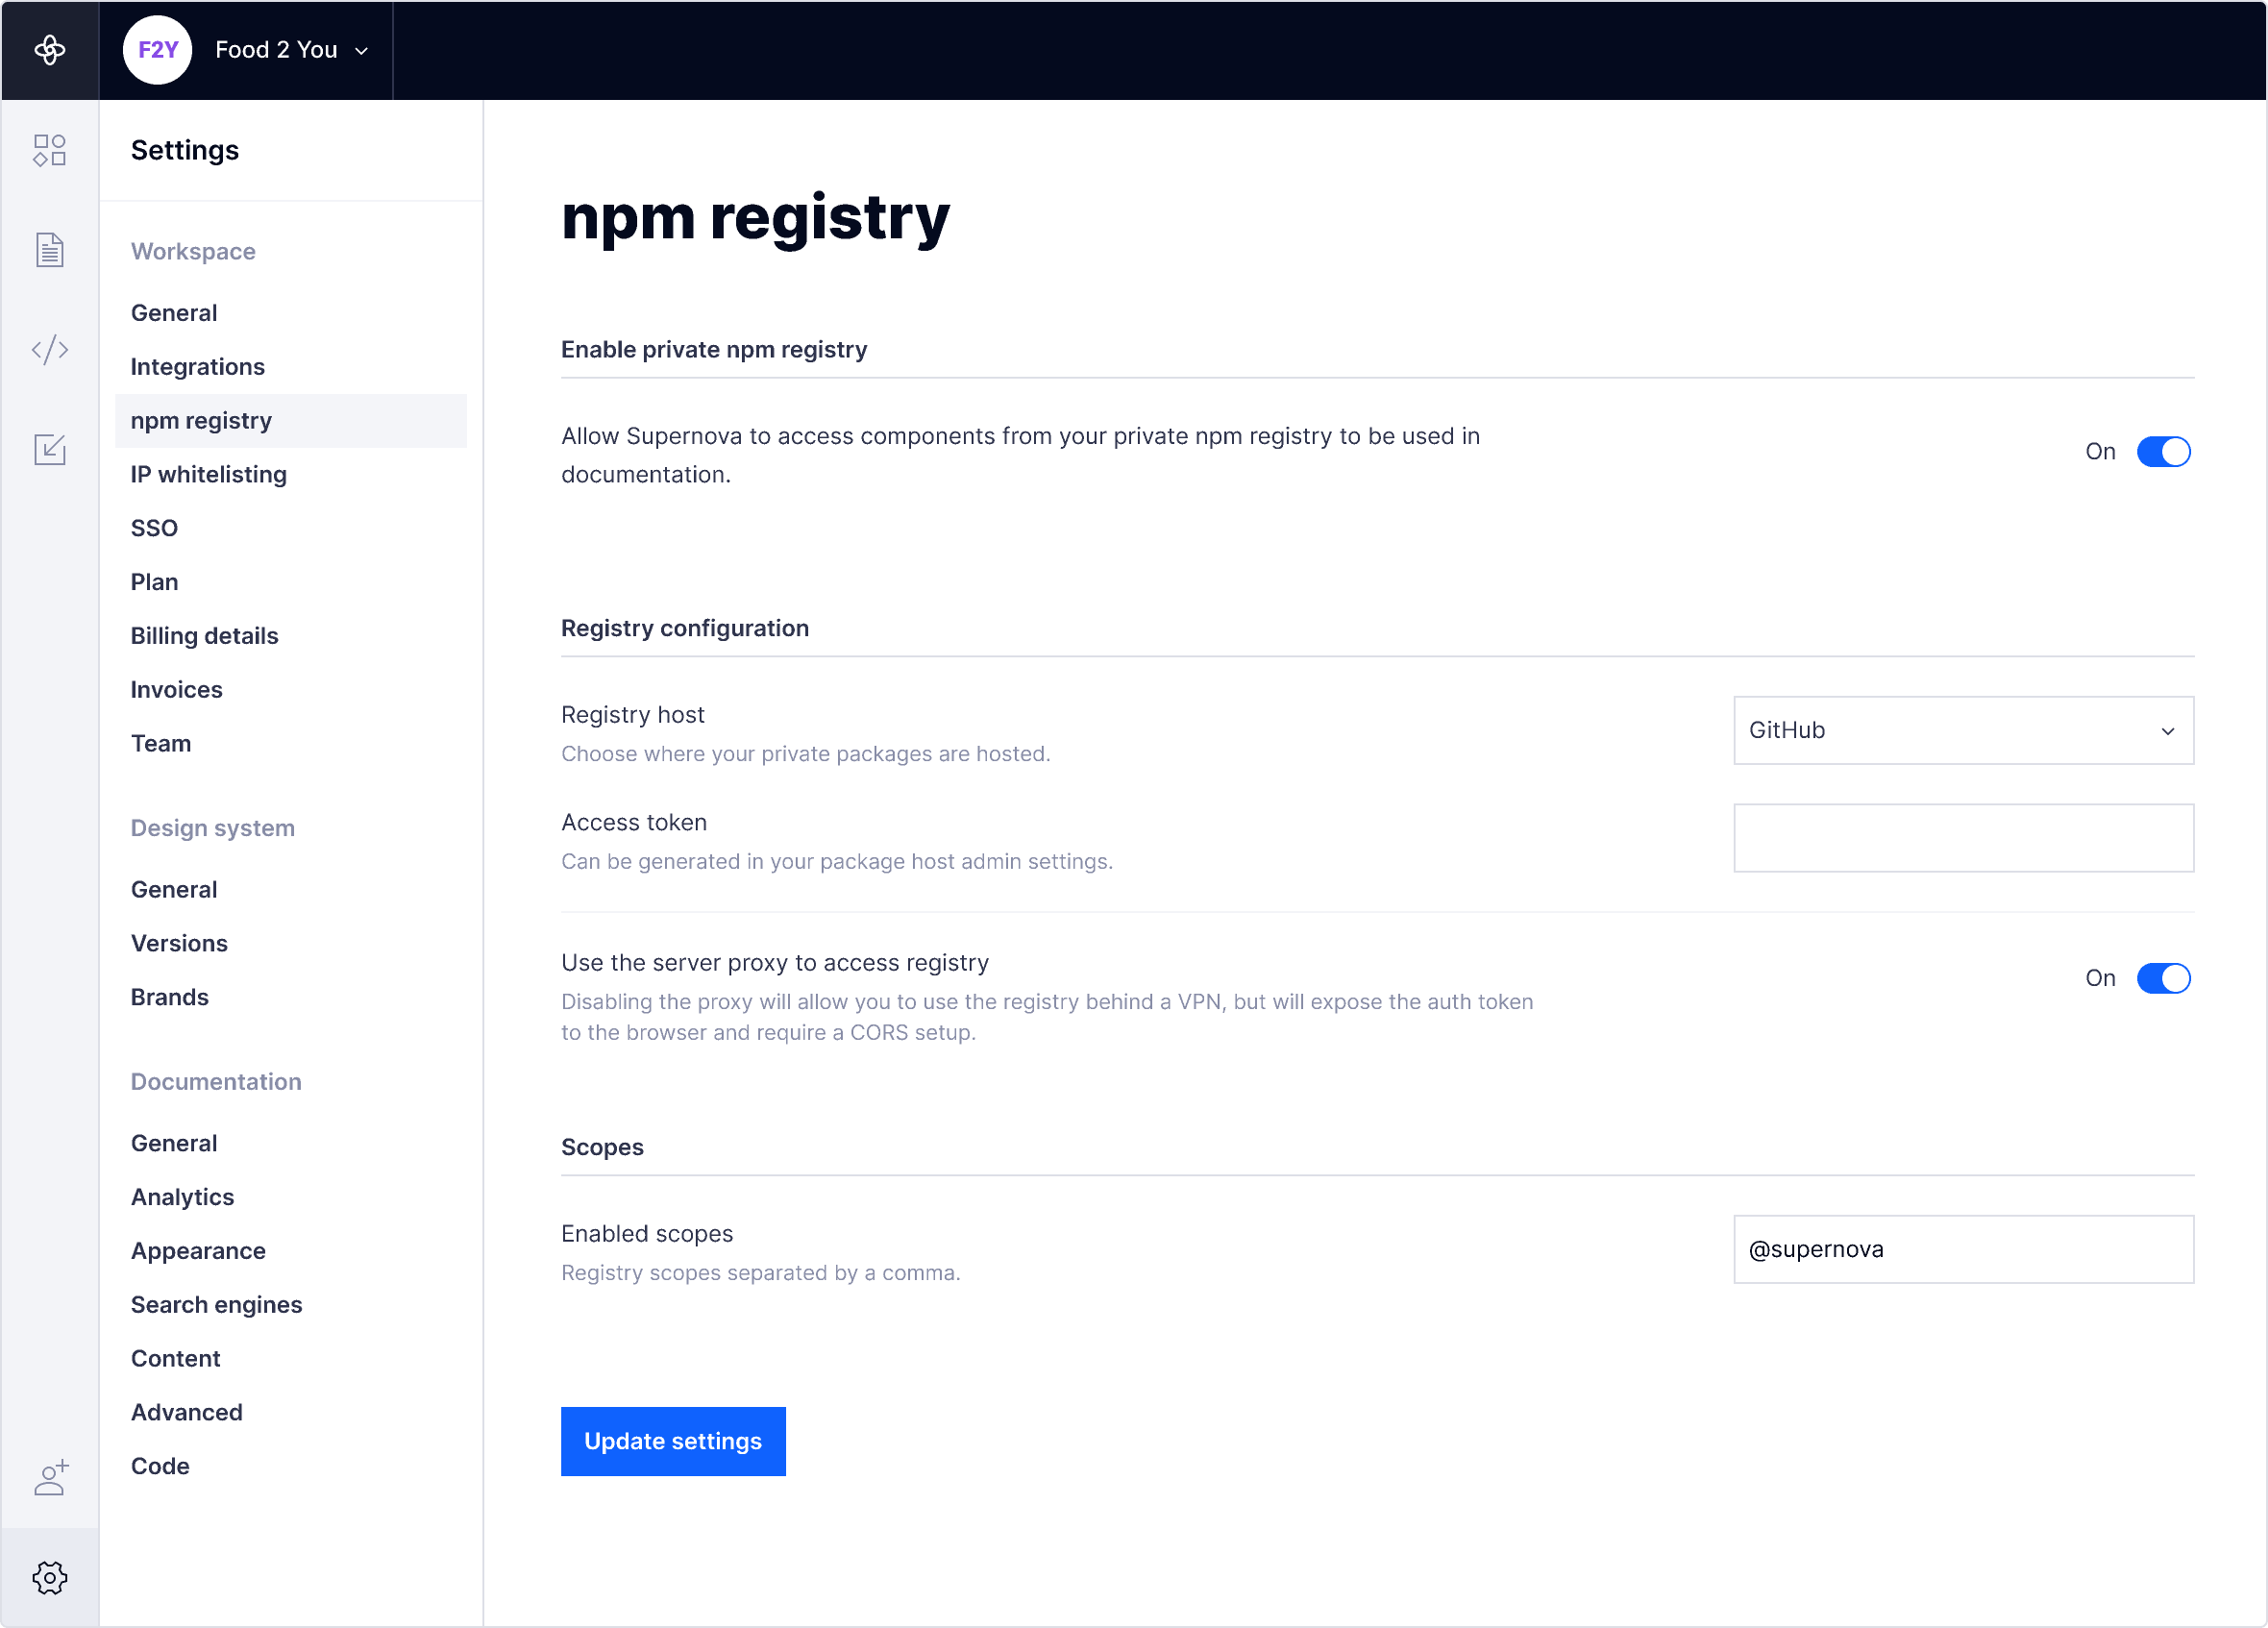
- Once the private npm registry setting is enabled, you’ll now see the Registry configuration section in your settings.
-
Select the registry host you would like to use from the following options:
npm
GitHub
Azure DevOps
Artifactory
Custom - Depending on which host you choose, the configuration options will be different.
GitHub or npm
- Select GitHub or npm as the registry host
- Paste the access token issued by your package host into the Access token field. This token can be generated in your package host admin settings. You can learn more about access tokens here.
- Set Use the server proxy to access registry to ON
- Enter the registry scope(s) you would like to use
- Click Update settings to save
Azure DevOps
- Select Azure DevOps as the registry host
- Paste in the registry URL, username, and access token or password. Is your registry behind a VPN?
- Set Use the server proxy to access registry to ON
- Enter the registry scope(s) you would like to use
- Click Update settings to save
Password: _password field in .npmrc
Access token: Can be generated in your package host admin settings.
Artifactory
- Select Artifactory as the registry host
- Paste in the registry URL and access token. Is your registry behind a VPN?
- Set Use the server proxy to access registry to ON
- Enter the registry scope(s) you would like to use
- Click Update settings to save
Custom
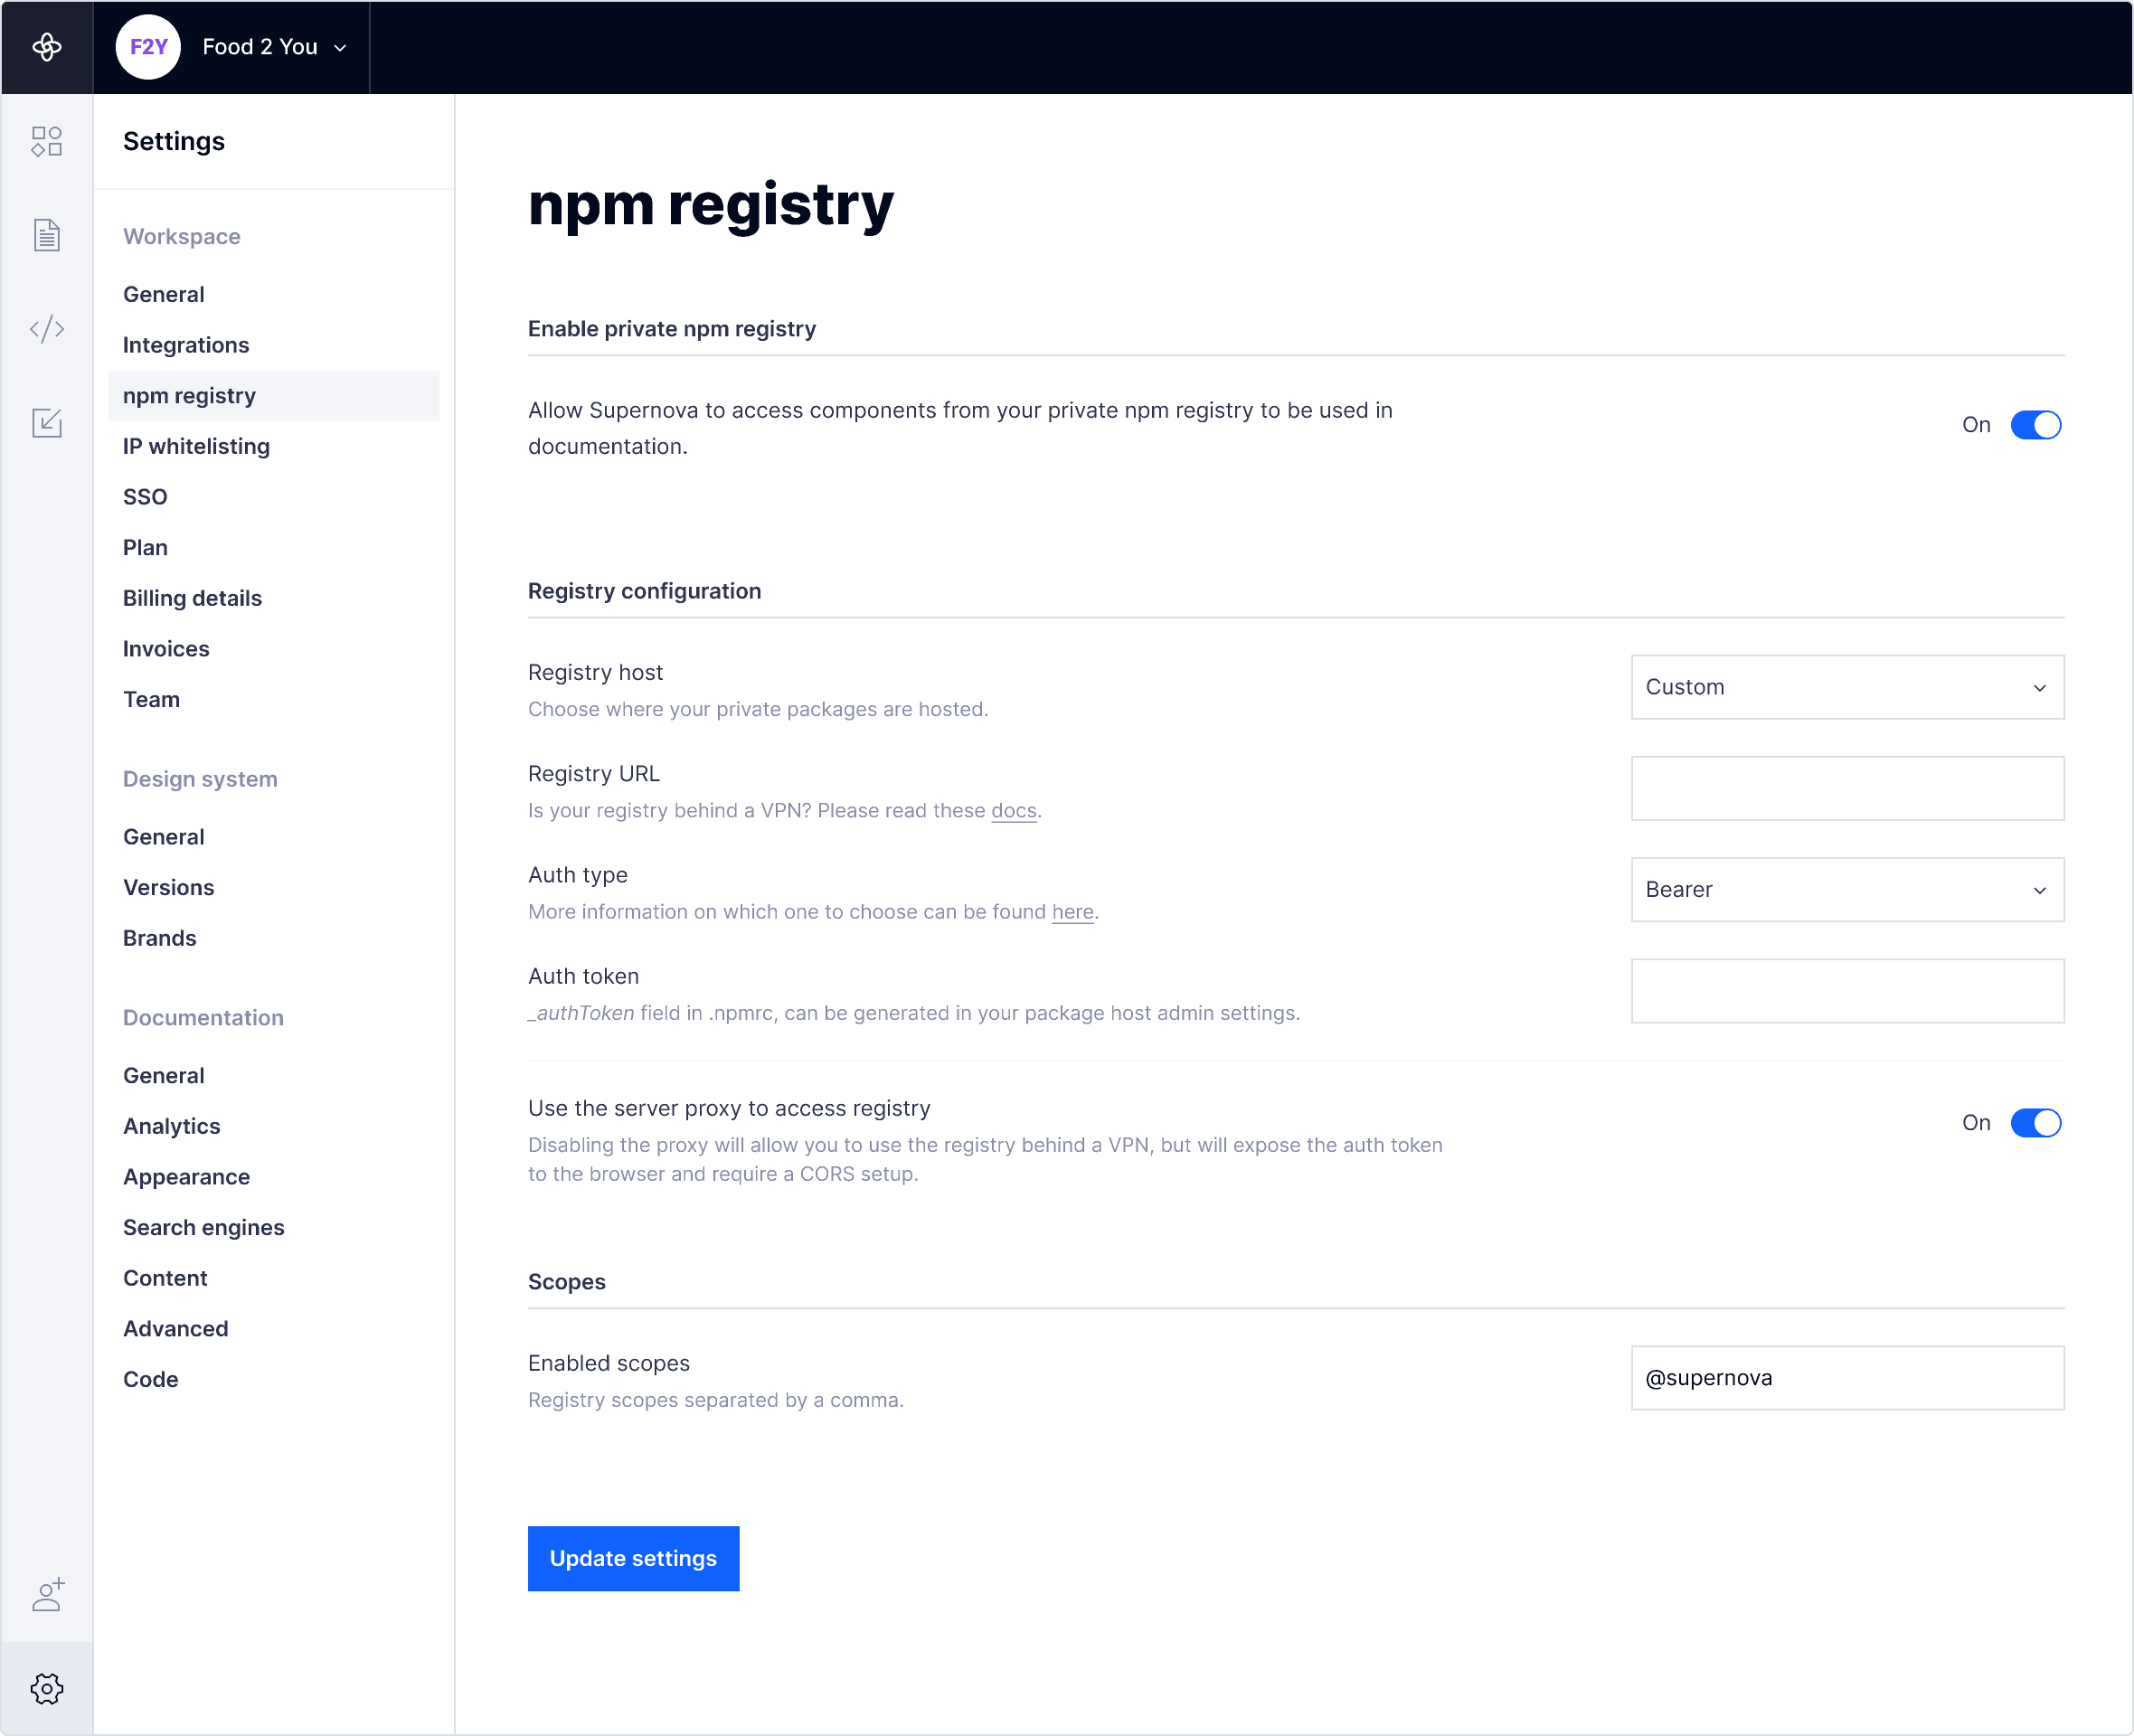
- Select Custom as the registry host
- Paste in the registry URL and access token. Is your registry behind a VPN?
-
Select the Auth type (Basic or bearer). Don’t know which Auth type to use?
Basic: Enter a username and password
Bearer: Paste in an auth token - Set Use the server proxy to access registry to ON
- Enter the registry scope(s) you would like to use
- Click Update settings to save
Auth type
You can find out which authentication type to use by looking at your .npmrc. If it shows _auth={token}, then you should use Basic auth.
If it shows something like: //registry.npmjs.org/:authToken={token}, then you should choose Bearer auth.
Registry scopes
We will only access the scopes that you provide through this setting. For example, if you enable @supernova as a scope, we will only use the registry to fetch packages that have this scope.
- In the Enabled scopes field, you can add the name of each registry scope you want to enable.
- Enable additional scopes by separating names with a comma followed by a space (i.e. @acme1, @acme2)
Use the server proxy to access registry
Disabling the proxy will allow you to use the registry behind a VPN, but will expose the auth token to the browser and require a CORS setup. See below for setting up a registry behind a VPN.
If disabled, your registry credentials can be found by anyone who has access to the documentation editor and published documentation.
Use a registry behind a VPN
If you would like to use a registry behind a VPN, we offer the following solutions:
Bypass the proxy
In order to bypass the proxy and and fetch packages from the registry directly, you can optionally enable this feature in the npm registry settings. Bypassing will share the auth token with everyone who has access. You must also add CORS headers to your registry in order to fetch packages directly.
IP whitelist

You can also whitelist the IP range of our proxy. Please request these details. Note: this is a Company or Enterprise feature and we do not guarantee stable IPs for other plans.
Self-host
You may also choose to self-host the proxu in your network. This will allow the proxy to communicate with our API server to validate the tokens. To set this up, please contact support.